28 September 2017

Dragon Rampant Action


Some Dragon Rampant action this week at the club to close out September.  I painted this army during this year's painting challenge but they haven't been out of the box since March - I'd forgotten how much I like them.  I played agains against Aled with his Gondor themed heavy Human army (also painted during the challenge).    We also used an additional rule from the blog of rules author Dan Mersey and each took a Battle Banner.  I placed mine with my Commander's unit:


New Upgrade: Holy Men & Banners
‘Holy Men & Banners’ special characters
  • Available to: Any unit except for Skirmishers or Villagers; units containing your Leader may not take this upgrade.
  • Cost: 1 point per unit.
  • Maximum of 1 special character per unit.
  • Special characters may not transfer between units.
  • Replace one ordinary model in the unit with a special character. This special character moves, fights, and acts in all ways like any other model in the unit.
  • Units with a special character gain +1 to all Courage tests (in the same way as, and in addition to, being within 12” of their Leader – see page 11 of the rulebook).
  • Test for the death of special characters in the same way as Leader Lucky Blows.
  • A player killing an opposing unit’s special character gains +1 Glory.

We played Scenario C but after Aled fumbled his first two turns and my army gobbled up 2/3 of the tokens we adjusted it so that the units that took the treasures kept them and once all treasures were taken we had d6 turns to get off the table with them.  That turned it into a much more balanced game.

We used a river as a long linear obstacle with a bridge and 2 fords to focus the action

The Action was thick and fast in the centre, where my Offensive Heavy foot, lead by my leader and with the Banner boosting courage tests, held out against repeated Heavy Horse charges.  They were eventually driven back with heavy casualties, unbattered and still holding their treasure token proudly.

"You shall not pass!"...except they eventually did, as they had boasted!  :-)
On the left flank I wanted to crush the impudent humans who stood against me, but Aled's placement of his Heavy Foot (with war banner) in a Wall of Spears near the ford was masterful and bottlenecked me badly.  My Heavy Horse was decimated and a lesser warbeast destroyed before he too pulled back in good order.  Songs of Honour and Valour would be sung in the Gondor camp that night
Stoic Gondor holds out on the left flank against the odds!

In the end, I held 6 tokens to Aled's 3, but he achieved a Glory boast and inflicted a lot more casualties upon me.  
I would call it a draw or a pyrrhic victory at best.  Great fun to get the DR toys out again!

26 September 2017

A return to the Arena

The Dux and I got together over the weekend for some long overdue gaming. Which means lots of food, beverages, chatting and occasionally a miniature gets relocated on the board.  Jugula was our game of choice:

The board was set

The Company was excellent

Wonderful victuals were prepared by Mrs Man Cave

There was action a plenty

We were most entertained

Alanus Victor!

18 September 2017

The Battle of Sourpuss Plain: ECW battle with Baroque

My Royalist left Brigade deploys under the command of Sir Percival Utterly-Barkinge
Over the weekend gaming club buddy Aled walked me through my first game using the Baroque tules set, released last year by the authors of Impetus.  It was a great opportunity to thrown down for some long overdue 6mm ECW action.
Royalist Horse deploys on the right flank near the church of Our Lady of Perpetual Guilt
Overall, I found the mechanics easy to pick up (I had a good tutor!) but it took me awhile to get my head around the damage system.  Once I did, I realised how elegant they are - adding and subtracting combat dice is easy to do, but damage impact is non linear.  That is, it's how badly a unit fails a coherence test that matters - not the number of hits it takes.  But naturally, it's easier to fail badly when hit a number of times.  So like real life, some units kept taking punishment volley after volley, while others evaporated much more quickly.
Foote Brigades engaged on Sourpuss Plain
Royalist Foot anchor the line behind the stone walls of the cultivated fields and engage the Roundheads
I also found that the Cavalry engagements on the wings was fast, strong and decisive (possibly because I had all those lovely Cavalier gallopers).  The melee combat system is the same as firing, but charging home adds dice as an impetus bonus and catching an enemy on the flank is brutally effective.  On the other hand, the infantry brigades in the centre were slow and difficult to adjust once committed (as you would expect).
A palpable hit indeed! Take that Roundheads!
I also quite liked the Army morale system: once reduced to half strength a unit is exhausted and its VPs are removed from the Force Morale.  However, if it is eliminated then double its VPs are taken.  Thus, withdrawing spent units before they die (and having reserves available to take their place) is not only sensible but essential in keeping your Army together.  But being able to withdraw the unit is not a given either...
Cavalier gallopers sweep away the Parliament horse on the right flank and penetrate into the enemy rear 

I felt like I was a General commanding the battle, though not everything was going to go the way I had planned it and there were certainly points of friction occurring around me.  Overall, a really fun experience and I'm looking forward to my next game.
And here is the WI review of the rules:

17 September 2017

Scout Troop

Delighted to report that I have been so busy playing and painting lately that I haven't had time to blog  :-)
Details to follow but here is a little of bit of fun I had along the way: Boy Scouts!
These lads are visiting Bexhill-on-Sea to work on their Batter pudding hurling badges (confused? You poor soul - see here) when the dreaded Hun dropped in.  Apart from the fun of painting them up, they are to be used as a recon team in OP SEALION
Lovely figures by 1st Corps with heaps of character, including all the meet badges etc.  They come with a range of hand/equipment options, but I liked the idea of the two boys also doing their archery and mechanic badges. I've done them up as my Dad's old Leicester scout group, including the scarf colours.

02 September 2017

Squadron Leader "Topper" Redfern

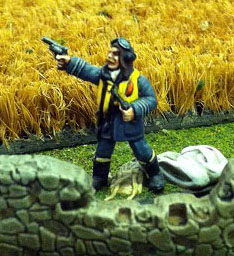
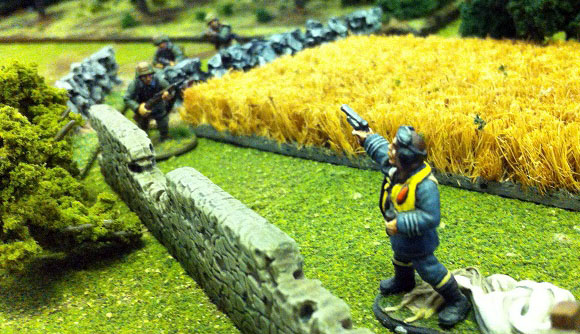
Presenting RAF Squadron Leader "Topper" Redfern, who was a Warlord special figure back in July 2015 for the anniversary of the Battle of Britain. I acquired him recently and after my recent efforts with Winston Churchill figure (here), was inspired to slap some paint on him right away. Yes that is a pipe he is holding - it must have been a tough scrap he just bailed out from!

Along with the special figure, Warlord posted this special mission to use him on the table (copied below from http://www.warlordgames.com/special-mission-downed-raf-pilot/ )

SPECIAL MISSION: DOWNED RAF PILOT


The Squadron Leader is sculpted having just bailed out of his Spitfire after taking a hit from a lucky German pilot. On landing he’s immediately been beset by Jerry and has pulled his service revolver out as soon as his feet have touched the ground.
Don’t worry though, Topper! We’ll get to you before the dastardly Hun!
Cost: Free!
Team: 1 ‘Topper’ Redfearn
Weapons: Pistol.
Special Rules: A hard landing
Just before beginning the first turn of the game, after all deployment is finished (including snipers, spotters and observers), the player places Topper on the table, following the same set-up instructions for the objective in the Hold Until Relieved scenario on page 114 of the Bolt Action rulebook.
Topper has exactly the same rules as a Veteran Captain, except that he cannot Run in the first turn of the game, because he has to dispose of his parachute first.
Back to Blighty!
If Topper manages to leave the table by moving into contact with the player’s own table edge, when the game ends the player treats a defeat result in the scenario being played as a draw, and a draw result as a victory (and, I suppose, a victory result as a ‘glorious victory’…).
On the other hand, if Topper is killed before he leaves the table, when the game ends the opponent treats a defeat result in the scenario being played as a draw, and a draw result as a victory (and, I suppose, a victory result as an ‘über-victory’…).
2015-07-07 15.57.33
Can you aid in his rescue before the vital information he has falls into enemy hands? Perfect for adding that extra layer of story detail to your battles in Bolt Action!