I wasn't happy with my array of gaming mats for use with Mortal Gods - they are all too woody, green and more like Northern Europe. So I decided to experiment and try making my own. The parameters were to be: looks Mediterranean and is easily portable for use on club nights.
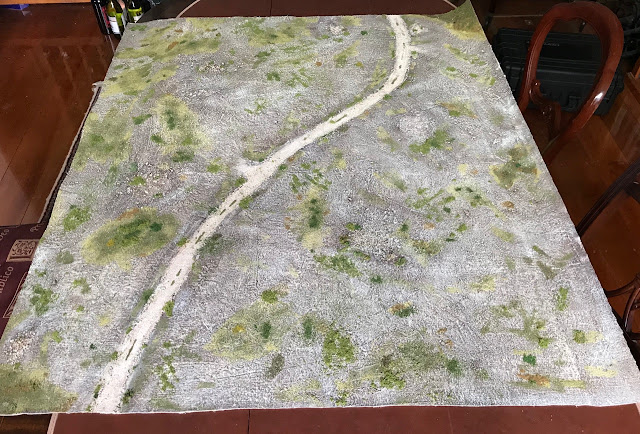 |
| The finished product - WIP pics below |
I went with a 3 x 4 size, using a cotton based material as a base which was pinned into place with drawing pins (to stop curling) with a few feet extra on each side. The first step was to make the base layer using caulk which I scraped thinly (with a strip of mdf) across the whole surface. This took a lot longer than expected and used a lot more caulk than I anticipated, possibly because of the absorbant nature of the base cotton material.
Once this was done a few small patches of gravel were made, as was a small track sized road from one side to the other - I used some ballast as the road surface and some kitty litter along the edges. These were all pressed into the soft caulk and left to dry overnight.
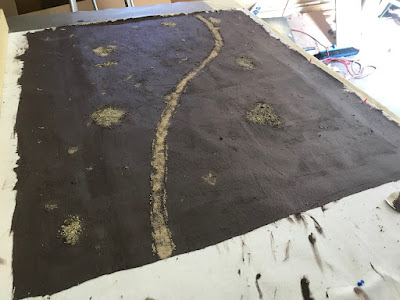 |
| I chose a dark coffee coloured caulk to use, so it would be a good base colour |
The next day another, thinner, layer of caulk was applied - as it dried and got tacky, I applied a range of cloths and material (including my index finger about a thousand times) to try and raise areas and provide a textured surface that would be suitable for drybrushing. In this way I would minimise the use of sand or other materials which are both abrasive to figures and which are prone to falling off when the mat is rolled.
 |
| First drybrushing layer was a Tamiya Earth colour, followed by lighter cremes |
Once that dried, I started drybrushing (using a range of browns and beige colours from Dulux style wall paint "sample pots") and the mat began to take shape.
 |
| After three layers of deliberately uneven drybrushing |
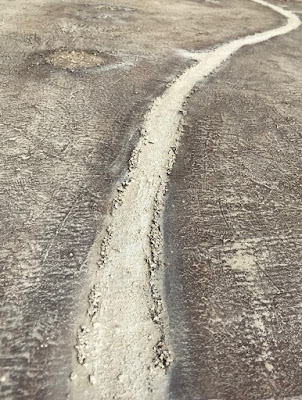 |
| Detail of the road texture |
After giving the paint an hour to dry I began flocking, initially using yellow, light green and brown and a little bit of clump foliage
In going for a drier climate look, the darker/green colours are at the centre, surrounded by the lighter patches where the vegetation is struggling. I was also trying to avoid thick patches of flock that might be prone to falling off when rolled.
 |
| Trying out with some olive trees |
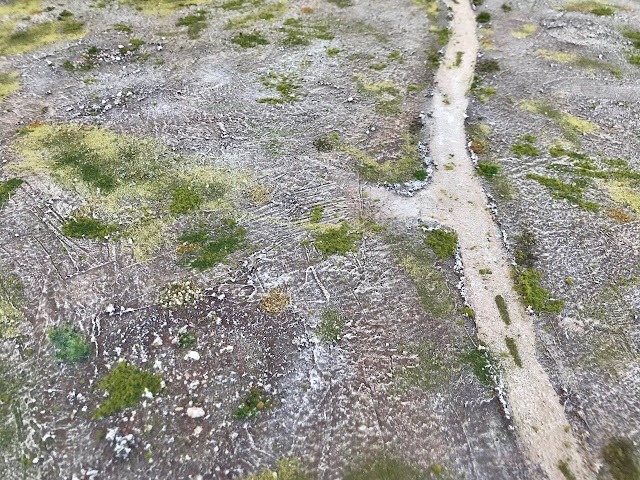
The mat was then left for a week to thoroughly dry (I was travelling interstate), and it slightly lightened in colour as it did. I then did another layer of drybrushing, including a little over the patches of flock to help blend them in. I then started adding some Woodlands light green and medium green coarse turf in a blended fashion. This added in additional texture, as well as helping avoid a spotty look by adding clumps in the areas between large flock patches.
I also applied a thinned out brown artist's ink along the road edge to define it better.
With the turf laid down, two light layers of watered down PVA were applied with a spray gun to help seal everything in place.
Of course, all Greek themed boards look better with a temple, poplars and some Spartans in position (not mine though, unfortunately!)
It was now trimmed down to size using a stanley knife and a long straight edge, and I did some final drybrushing to the road surface and rock edges - ready for battle!
 |
| Picking out the road edge and the odd rock in white on the mat really made it pop |
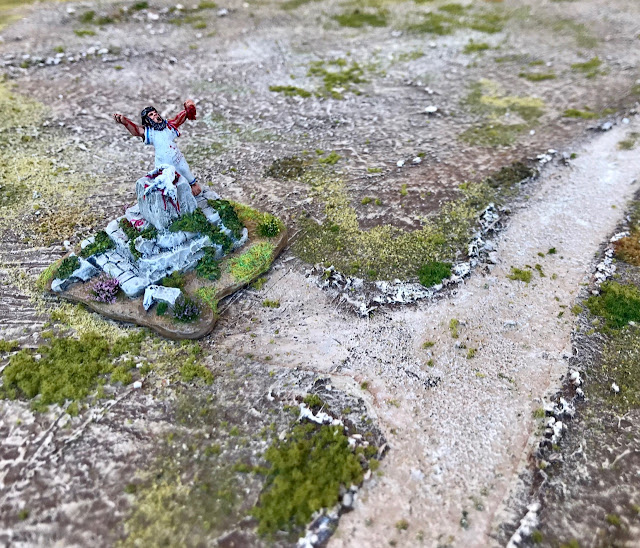 |
| On to road to Corinth... |
I'm pretty happy with the outcome and I picked up some good techniques during this project. Thanks to club mates Mac and Gav for their invaluable assistance and advice along the way (and more than a few of the materials Gav - cheers mate).
Overall materiel costs were similar to buying a commercial product, but I think I have achieved a better outcome and enjoyed some time with my mates along the way.


Very good tutorial and result, thanks.
ReplyDeleteThanks Norm!
DeleteThat just looks amazing Paul, really well done!
ReplyDeleteThanks Michael!
DeleteGreat looking mat,I need to do one for the Mediterranean,does yours roll up without losing too much material?
ReplyDeleteBest Iain
Thanks Ian. The caulk is very flexible so it rolls well, and not using sand will help longevity.
DeleteOnly losses thus far have been small clumps of flock, easily replaced (but usually not even noticeable)
Looking great Paul! Makes me want to make one!
ReplyDeleteCheers Steve. Like home renovations, its all about a bit of confidence and willing to try something new. Costs a bit less though!
DeleteGreat stuff Paul, and very useful :)
ReplyDeleteThanks Tamsin!
DeleteA wonderful bit of work, well done.
ReplyDeleteCheers Frank!
DeleteSmashing stuff mate. There's a project for my week off coming up!
ReplyDeleteLooking forward to seeing how it comes out mate!
DeleteGood job Paul it looks the business. I wasn't brave enough to put any paths or tracks on mine.
ReplyDeleteThanks mate - it adds a lot to it I think.
DeleteNext time I'll have a better plan on the layout so I can add more complexity or space for a hill or other feature
Wow, that’s a great piece!
ReplyDeleteCheers JB!
DeleteThat looks superb! Perfect for the Mediterranean setting.
ReplyDeleteThanks!
DeleteLooks great and I am keen to try it out. Particularly since I may have picked up a copy of MG today...
ReplyDeleteExcellent! I look forward to your table debut Strategos!
DeleteImpressive, and thank you for the step-by-step detail.
ReplyDeletemy pleasure
DeleteNicely done. It looks excellent.
ReplyDeleteThanks Lee!
Delete