31 July 2007

3rd Squad profiled

Here are the last closeups of the platoon - 3rd Squad. Once again, click for larger images.


For those interested in the bases, they are Battlefield Accessories Pacific pack (#BA48), containing 8 medium and 3 small resin bases, which I bought from Olympian games in Canberra.


30 July 2007

2nd Squad - Fall In!

As promised, here are some additional closeups of my Marine Platoon. This time, 2nd Squad takes post ready for the next patrol...
Click pics for larger images


28 July 2007

USMC Platoon Ready for Action!

After 2 months of preparatory training, my first USMC Rifle Patoon is ready for deployment to South Vietnam, Republic of.

Click pics for larger versions

I'm very pleased with they way these figs turned out, actually and they are probably the best 15mm troops Ive done (No, I havent done many!). The Figures are all Flashpoint Miniatures, and the sculpted resin bases are by Battlefield Accessories (in FOW sizes). See my earlier posts on the clour used for painting the fgures. The Pacific themed bases pack has the nciely molded palm leaves, vines and rocks. I thought they were excellent, though the basing of the miniatures took longer than I had anticipated because of the extra spaces around the figure bases which had to be filed in.

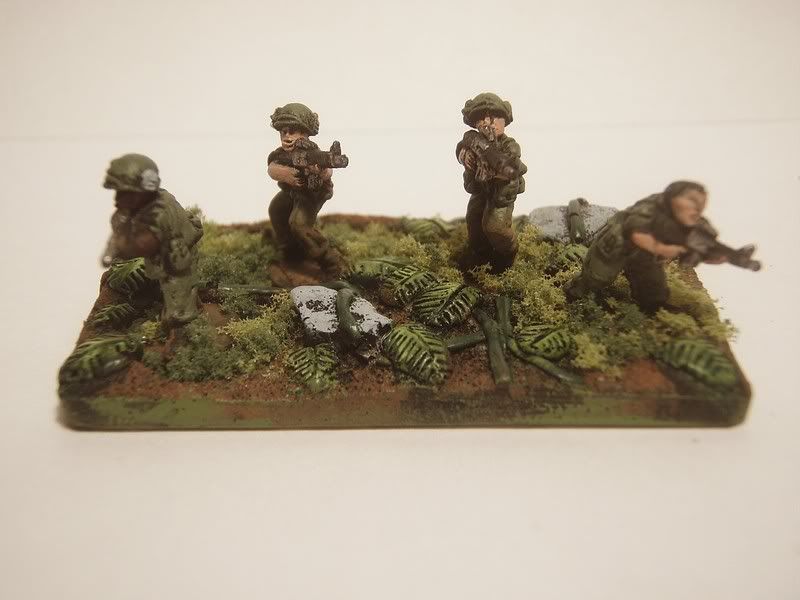
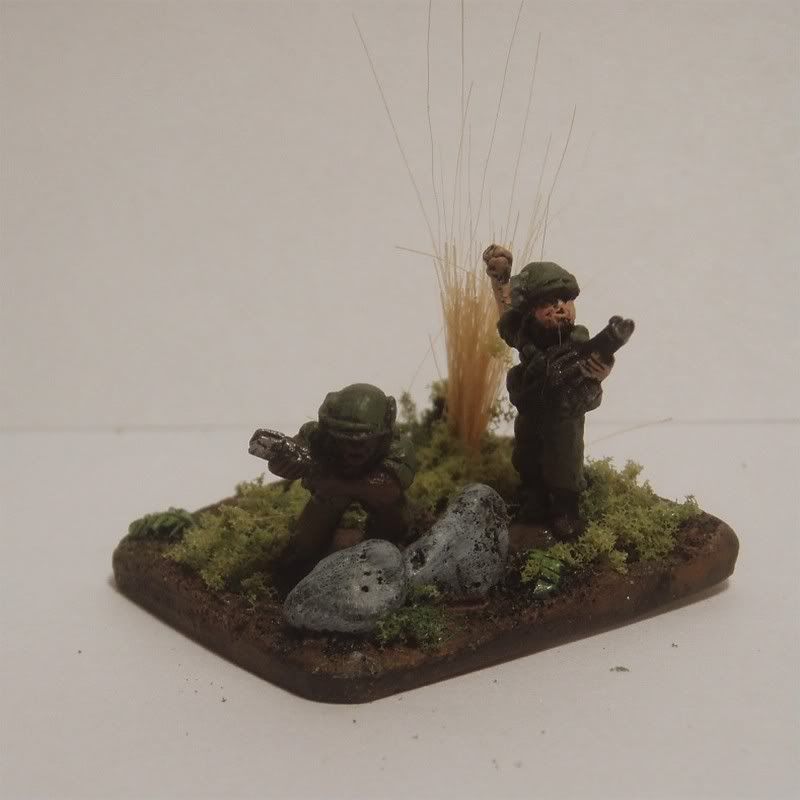
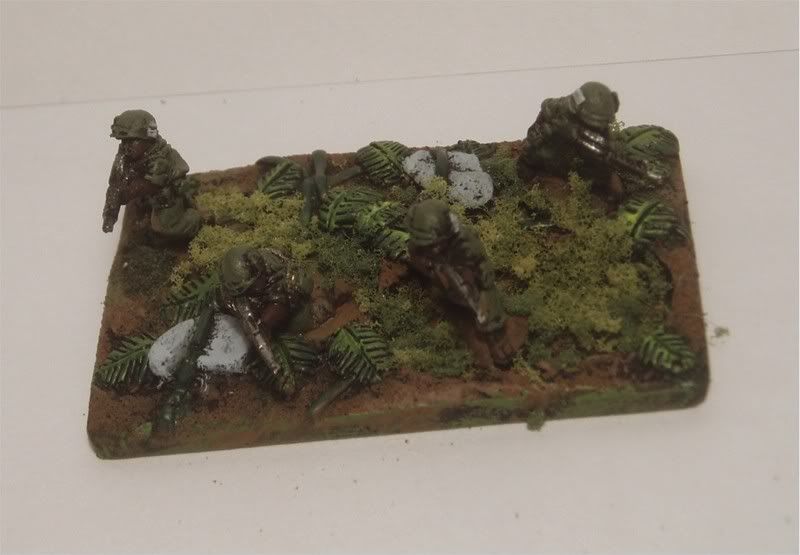
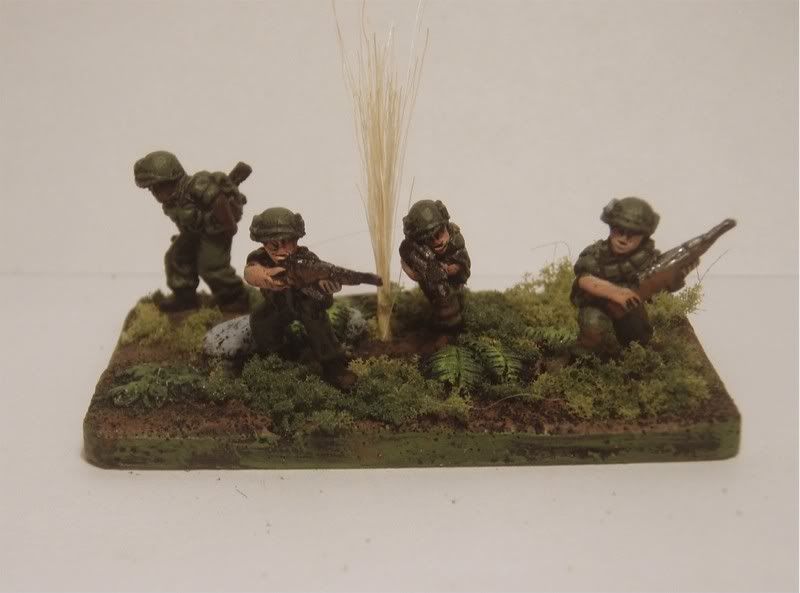
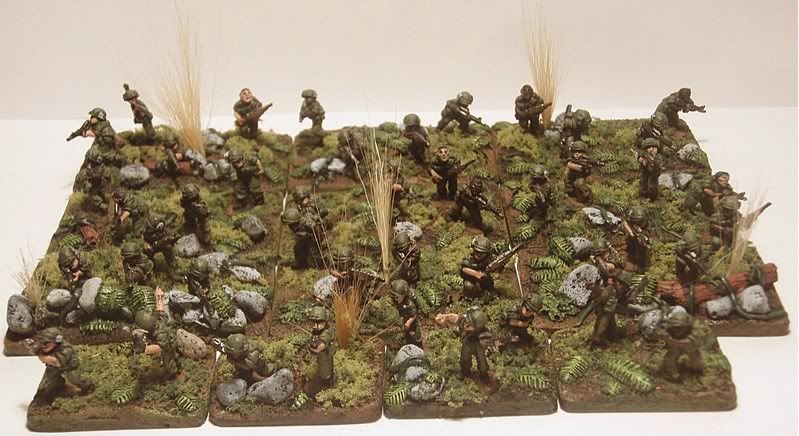
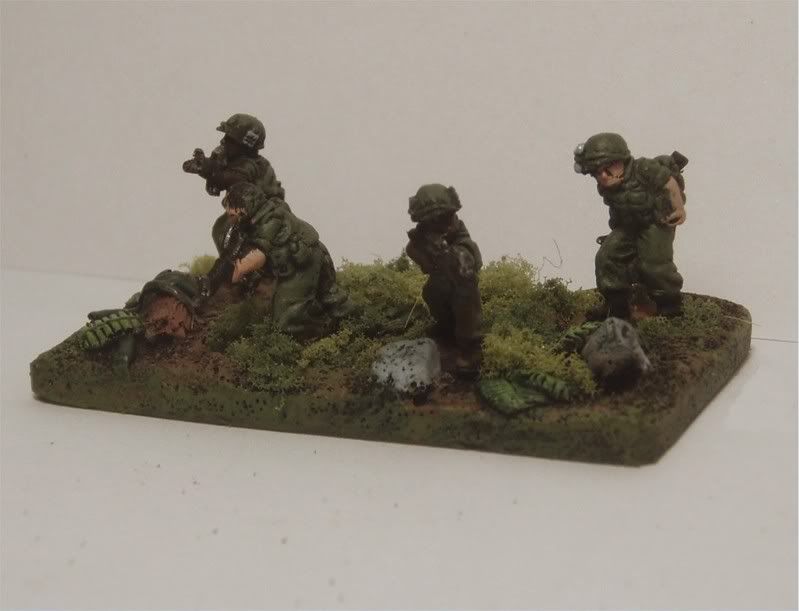
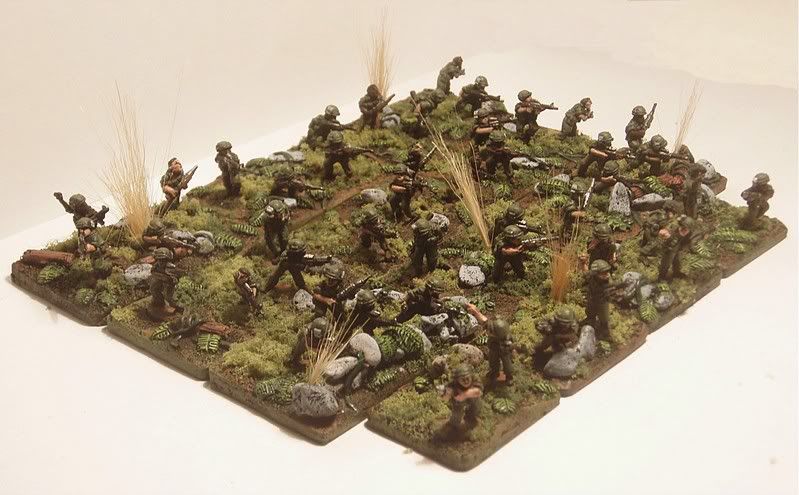
The bases were spray undercoated black, drybrushed with Tamiya Dark and Flat Earth and detailed - rocks with Ral Partha Slate and the Palm leaves with GW Jungle green and a touch of Sunburst Yellow. Foliage is All Woodlands Scenics - Dark and Light course turf with some grass tufts added in using PVA glue. Actually, the grass tufts need some work still, I'm not really happy with most of them.

Heres the LT and the boys from 1st Squad (comprised of a Squad HQ of 2 men and 3 four man fireteams). Closeups of the other individual squad bases will follow shortly.


Now its into the boonies to find Mr Charles...

15mm Nam Buildings

If you are after more bits for your Nam table, you may wish to check out these guys: http://www.frontlinewargaming.co.uk/
I havent seen any of these in the flesh (please let me know if you have), but they would be great if you are building a firebase

15V1 VILLAGE HUTS ( TWO TYPES ) £4.15
15V2 CORRUGATED IRON SHELTER £2.15

15V3 TENT ROOFED SHELTER £2.15


15V4 PART BURIED SHELTER £2.15

27 July 2007

FOW Vietnam pics

Andy has posted some pics of his 15mm Vietnam forces - he has built a 7th Cav force using both Flashpoint and Peter Pig miniatures (and 14 diecast Hueys!). His group (the Cheltenham Warchiefs) have been gaming with a set of Vietnam mods to the popular Flames of War rules.

Here is a sample of his Airmobile force. You can see more pics of his US force and nice terrain here:

26 July 2007

Book: Australian Military Operations in Vietnam

Saw this cracking book today at a conference, a great read filled with good photos and graphics.

AUSTRALIAN MILITARY OPERATIONS IN VIETNAM: by Albert PALAZZO

"From 1962 to 1972 Australia joined the United States in fighting a communist inspired insurgency war in the jungles of South Vietnam against infiltrators who sought to overthrow the local government. Over 50,000 Australians served in Vietnam, 519 lost their lives, and the conflict ended ignominiously in the insurgents' victory.

Over 30 years later, Australia again finds itself joined with the United States in a struggle against an insurgency, this time in the deserts of Iraq and the mountains of Afghanistan. Although now in the past, the Vietnam War resonates with lessons for the Australian Army as it strives to defeat not Communism but Terrorism. Australian Military Operations in Vietnam highlights some of the successes and failures of an earlier generation of officers for the benefit of today's leaders."
You can order it here:http://www.warbooks.com.au/IndividualBooks/InVietnam.html

25 July 2007

USMC Rifle Platoon nears completion

My first USMC rifle platoon is almost complete - Ooh-Rah!

The figs look quite good on the sculted Pacific Theme bases by Battlefield Accessories. I'll grab some extra foliage this weekend to finish them off and will post pictues then.

24 July 2007

New FPV BatRep posted

A new battle Report was posted last week, starring FPV author Anton. An NVA vs ANZAC scenario:

" Well we finally get a BATREP for a game played by two fire teams of Flashpoint Miniatures staff and helpers. Anton "Six Actual" Ducrot and Chris "Crunchie" Putan (2000 points NVA and VC including a MiG-17 for air interdiction) and Drew "Dragonfire" Birkmyre and Andrew "Foggy" Fogg (2000 points ANZAC's with a USMC Ready Reaction Force mounted in helo's), played a Free Fire Zone mission. Three allied VC cells held up the ANZAC left flank for several turns before finally being over run by the ANZAC's while the balance of the ANZAC's were face to face with two full strength NVA platoons. The NVA "popped" the recoiless rifles in an ambush on the unsuspecting ANZAC M113's on the ANZAC right flank leaving nothing but a pile of flaming wrecks. The ANZAC's never got a chance to call in the USMC as they could not get a clear LZ with all potential sites well covered by the NVA HMG's and AT-7 Saggers. It was a battle of attrition and a draw was called once resources, the beer, rum and pizza's, ran out. Kim "The Boss" Ducrot watched on in awe (yeah, right) supporting the communist forces while your intrepid reporter, Ken "TailEndCharlie" Cole, played scribe, photographer and waiter."
See some great photos of the action here:

22 July 2007

Paddy Field Modelling

I found some more neat terrain modelling tips and ideas at the War Factory website today.

Here you can find how to make paddy fields http://www.warfactory.co.uk/scenery/vpaddy2.php

or really flashy ones if you have perspex or glass available
http://www.warfactory.co.uk/scenery/vpaddy.php

. .
And here is a great shot from the War factory site of a OV10 Bronco overflying some of their home made paddy fields

21 July 2007

Brown Water Terrain Modelling

This article from Eleven Bravo (formerly known as "Grunt!") details a great method for creating Delta like rivers for Brown Water Ops. Just the thing for that nice new PACV model... Check it out!

http://www.eleven-bravo.co.uk/wargaming/little-wars/riverbank.php

EDIT - Sadly, Mike the owner of the Eleven Bravo site has passed away and the site has since closed.  I've copied the article here in its entirety.


Modelling River Terrain for Vietnam Riverine Operations

If you are planning operations in the Delta (IV CTZ) or you are rolling out a Riverine Force, you are going to need to represent a river on the tabletop. This article relates how I built my own river sections for use with 10-20mm figures. Each river section is 1-foot long and there are four of them so that the river can fully run across a 4' x 4' gaming board.
The river-banks of each section abutt those of the adjoining section so that this is a single channel waterway. I am intending at some later stage to model streams and tributaries running into the main waterway as well as river bends.
The modelling process is very straight-forward and can be completed in a couple of days - most of this time is taken-up with waiting for the modelling putty to thoroughly dry out.
Materials Used:
  • 3mm Perspex (or other suitable base material) sheet measuring 30cms x 24cms
  • Das Putty modelling clay
  • PVA Glue
  • a contact adhesive such as Evostik
  • brush hairs
I chose a Perspex base because I was fed-up with other materials warping when used for this kind of project. I am fortunate enough to have a good source of Perspex (thanks dad) and so this was easily obtainable. MDF is probably a good material to use also but may, over time, warp. Unfortunately, Perspex is rather expensive unless you can obtain off-cuts.

Method

For my river sections I wanted a channel that was a minimum of 14cms wide. Using a pencil I marked in 5cms from the outside edges and then drew an irregular line representing the river-bank to join up the marks. In this way, the river-bank itself will be irregular but each of the sections will abut each other perfectly as long as each end of the river-bank ends 5cms in from the edge of the base.
Template
Once you have marked out the river-banks in pencil, roll out two long 'worms' of putty. The thickness of the worms will determine the width of the river-bank and this is simply a matter of choice. Personally, I did not want the river-bank to be too wide or steep but to simply represent the edge of the waterway.
Shape the 'worms' on the base to represent the irregularity of the banks but make sure that each end of the putty bank finishes on the 5cm markings. Also make sure that the putty bank extends beyond the edges of the base to allow for shrinkage as the putty dries.
Once the putty worm has been shaped to form the river-bank, simply flatten it out with the end of your finger. I then left the putty to dry for a day. Originally I glued it in place immediately using PVA glue, however, PVA does not adhere to Perspex very well and when the banks were dry they came away from the base very easily. Therefore, once the putty banks have dried out, glue them to the base using a contact adhesive.
The banks of rivers are generally thick with lush undergrowth right up to the edge of the water. I wanted my sections to look like this when finished but I also wanted them to be reasonably easy to store. As a compromise, I decided to have some low ground terrain permanently modelled in place on each bank. Then, when I set up the river sections on the gaming-board, I intended to place free-standing undergrowth along the banks in order to achieve the crowding and density of vegetation seen in so many pictures.
Using lumps of putty, I fashioned clumps of bushes at irregular intervals along the bank-side. Each bush was made from a blob of putty that was glued in place using PVA glue and worked on while still soft. Using some tools and picks from a wax-carving set, I textured the putty blobs to represent leaves and foliage. Note that I made no attempt to model individual leaves but my intention was to create a texture that, when subsequently painted, would represent foliage.
At this stage I also decided to add some reed beds and modelled these into suitable places. This was done by simply spreading some putty out from the bank-side and into the main waterway. While the putty was still workable, I cut some brush fibres and, after dipping them in PVA, stuck them in place close to the river-bank.
I modelled two or three lumps of vegetation on each river-bank and deliberately avoided modelling an unbroken line of vegetation. My reasoning for this was that I would be using the breaks in the vegetation to place huts or crossings etc. My intention was to model the river sections in such a way as to make their use as flexible as possible on the table-top.
Once I had glued the reeds in place, the river section was, to all intents and purposes, complete. Now I just left it for another day for the putty to completely dry out prior to painting. Once completely dry, I used a small hand-saw to cut off the ends of the river-banks so that they were flush with the end of the base.

Basic template and river banks

Perspex template with banks
First stages complete. Note that the banks are irregular over the course of their length but each ends in a fixed position 5cms from the edge of the base. Note also that the banks extend beyond the ends of the base to allow for shrinkage.

Riverside Undergrowth

riverside undergrowth
Putty 'blob' in place and then simply textured using a pick

Reed Bed

Reed bed
Adding some river-bank reeds

Template and undergrowth

Basic template before painting
River section with banks and clumps of vegetation glued in place.

Ready for painting

Prior to painting
River section drying out. Note that the ends of the river-banks have been cut flush with the base

Banks and water base-coated

River section base coated
River section basecoated with green and brown

Vegetation painted and highlights added

Vegetation painted
Vegetation painted and shallows stippled in.

The completed River Section

Completed model
Completed and unadorned river section


Painting

I undercoated the entire river section in black primer. The river-bank and ground beyond the river bank was then painted a basecoat of Goblin Green while the river itself was painted a basecoat of Bestial Brown.
I then went over the green areas with Color Party Basetex textured paint which, when dry, I drybrushed with a mix of Sunburst Yellow and Bubonic Brown. The clumps of vegetation were then also dry-brushed using various shades of green. When dry-brushed, the textured finish on the putty really comes into it's own and the vegetation looks like dense leaves.
Along each bank, at the waterline, I painted a very watered-down line of Snakebite Leather to represent the shallows next to the bank. I actually used an old brush to stipple this paint on the base rather than paint it as a solid line. Because it was so watered-down, it formed an almost translucent finish and was irregular in density. 
Next, I painted the reed beds. The base of the reed bed which, in effect, is mud, was painted with a very dark brown and then dry-brushed with Bestial Brown and finally with Snakebite Leather. The reeds were simply brushed with Bubonic Brown.
After everything had been left to dry, I finally added two coats of yacht varnish to the river surface. The river section was now complete.
Once completed, the river section can be used with both 10mm and 15mm riverine vessels. It is also useable with 20-25mm figures as a wide waterway or canal. It is not wide enough to accommodate a 20mm ATC such as that produced by Britannia but an ATC at smaller scale will not look out of place. Overall, I was pleased with the end result and it is not too difficult to store each section - they simply sit flat on top of a couple of cupboards hidden from view!


Additional Pictures of Completed River Sections

River and gaming table
A 4' x 4' gaming table with river sections in place
Riverside Ville
View of the river and a small river-side Ville surrounded by fields and paddies.
US PBR scans the river bank
A 15mm PBR, it's crew warily watching the banks, cruises the river
10mm riverine monitor
A 10mm Monitor making it's way on the river
US PBR patrolling
Top-down view of PBR. Note how free-standing terrain has been used to crowd the bank with vegetation.

11 July 2007

ANZAC vs NVA BatRep posted


FP Miniatures has posted the frst BatRep on its FP-Reloaded section. Taken from a DFree Fire Zone scenario game played at Dragonfire Miniatures, you can see more of the action here: http://flashpointminiatures.com/batreps/fpr/vn/fpr_vn_batreps-0001.html

10 July 2007

PACV arrives in country

I ordered a model of a US Navy PACV in 15mm from Tim at Gomi designs last week and it arrived today. And a nice beast she is too!

This is what was advertised at TMP "The PACV (Patrol Air Cushion Vehicle) was used to patrol the Mekong Delta and Plain of Reeds. This resin kit with high quality metal parts is of the earlier SRN5 version. It measures around 4.5 inches long, 3 inches wide, and stands around 1.5 inches tall when assembled." These pics from TMP too.

The parts are very detailed and crisply cast. The main hull is resin and all the fittings are lead. No crew is available yet but they are coming in the near future. Cost: £8.99 plus £2.50 for postage to Australia.

I'll post pics of mine when she is sea worthy!

08 July 2007

I FINALLY got hold of some more Pacific theme sculpted bases so I can now finish off my USMC Platoon and the Company HQ...

07 July 2007

More ANZAC SAS pics posted


New ANZAC SAS pics posted to the Flashpoint website. I really like the basing on these - very nice indeed.

03 July 2007